Have you ever had cherry tomatoes that tasted so good, you cried a little on the inside when they were over? Or bell peppers that were so sweet, they added instant pizzazz to every salad you made? If only you had saved their organic vegetable garden seeds so that you could have more of them in the next garden season. If you’re looking for a great and inexpensive way to carry on your favorite vegetables, seed-saving is the way to do it. If done right, you’ll always have an infinite supply of tasty veggies all-year-round. We’ve prepared the ultimate seed saving guide to show you the proper way to save organic vegetable seeds for planting.
Saving Organic Vegetable Seeds 101 – the Seed Saving Basics
The first thing you need to understand is that growing a plant with the sole purpose of seed saving is different from growing it to eat. Take lettuce, for instance. If you want it to produce seeds, you need to wait until it develops its spindly flower stalks. These are what eventually go on to produce seed pods.
By this point, the once vibrant green lettuce leaves will have long since shriveled up and turned yellow. Although they’ll be too bitter to eat, you’ll have several lettuce seeds to cultivate and get an abundant supply of the vegetable. That’s the first lesson you’ll need to learn when you embark on a seed-saving endeavor.
You also need to know what seeds to collect, when to collect, and how to collect them. The rule of thumb, when dealing with fleshy vegetables like melons, squash, and tomatoes, is – you need to wait until they’re fully ripe. That’s when you scoop out their seeds and spread them out to dry on a flat surface in a cool, well-ventilated place.
The seeds of vegetables like peas and beans, on the other hand, have to be left in their pods on the vine until they are completely dry and crackly. The same applies to corn seeds. Leave them on the stalk to dry out until you start to notice the kernels denting.
A seed is not viable until it is fully ripe. If you pick it from the plant too soon, then it won’t germinate. Seed maturity and crop maturity mean two entirely different things in the gardening world. The latter happens a lot sooner.
Pick the Seeds From the Healthiest Plants
For the love of all-things vegetables, only pick seeds from the best and most vibrant plants. That way, you’re certain that the generations of crops that follow have all the desirable attributes you want them to have.
Don’t waste your time and effort saving seeds from F1 hybrid varieties. Hybrids are two different varieties of a crop that have been crossbred through cross-pollination, to get a third variety with a combination of desirable traits from each parent plant.
Hybrid seeds produce offspring that have a combination of random traits that aren’t so great. They are very rarely anything you would want to eat.
Proper Storage Is Paramount for Seed Saving
To keep your seeds viable for a long time, make sure that your cache always remains cool and dry. If you don’t, they may end up sprouting, getting mold, or affected with mildew.
Depending on the seed variety and how well you store them, their useful life ranges anywhere between two and five years. Pea seeds, for instance, can keep for two years, whereas lettuce and cucumber seeds can last for up to five years.
Depending on the particular variety, some can even last up to a whopping 10 years. A simple test you can do to tell if the seed is completely dry is to push your fingernail into it. If it gives, you need to dry the entire batch for longer. If it doesn’t, then it is sufficiently dry.
Place the dried ones in seed packets or paper envelopes that are labeled with the name of the seed variety and the date you harvested them. Then keep them in airtight mason jars in a cool and dark place.
How to Save Different Types of Seeds
Here’s how to go about saving the seeds from some of the most popular vegetables and fruits.
1. Tomatoes and Cucumbers
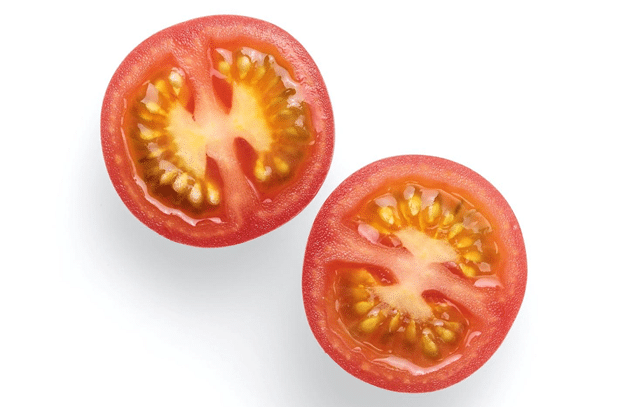
Seeds from these vegetables are usually coated with a slimy gel. The only way to remove it is through fermentation. This involves putting the seed mass in a glass or plastic container before adding an equal volume of water.
Leave the mixture out in the open for a couple of days, making sure that you stir it at least once every 24 hours. After a few days, the viable seeds will sink to the bottom. Rinse them out, place them on a plate, and leave them to dry in a warm place. The drying process can take several weeks.
2. Melons and Cantaloupes
Remove all the debris and membrane attached to the melon and cantaloupe seeds and give them a good rinse under running water. Place them in a container filled with water and leave them to stand for about an hour.
The good seeds will sink the bottom while the bad ones will float to the surface. Pour out the water and place seeds on a plate before leaving them to dry.
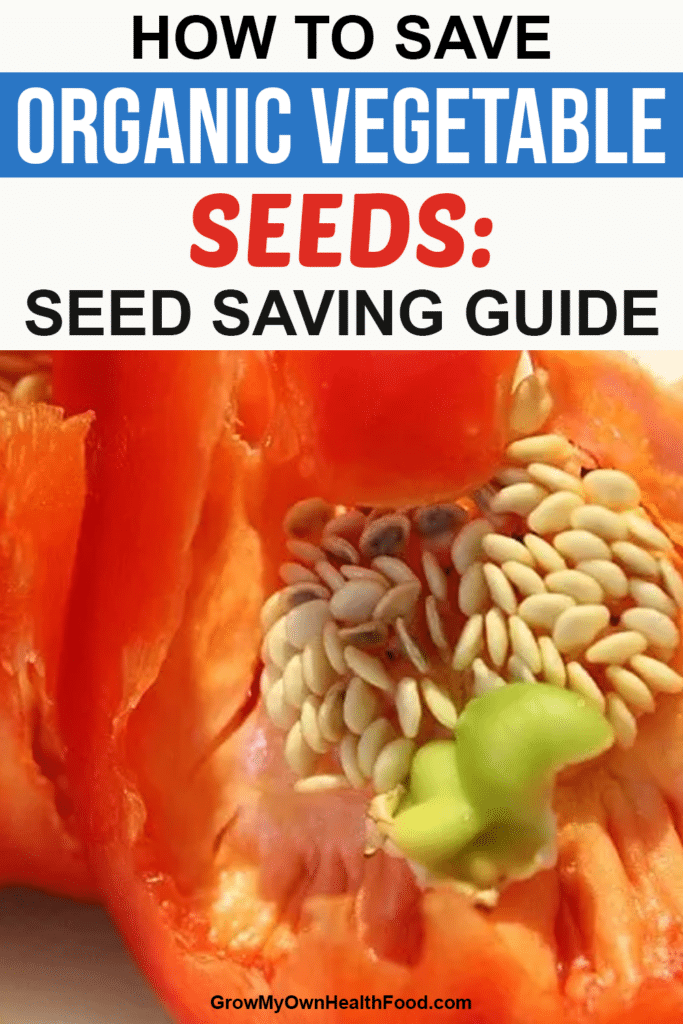
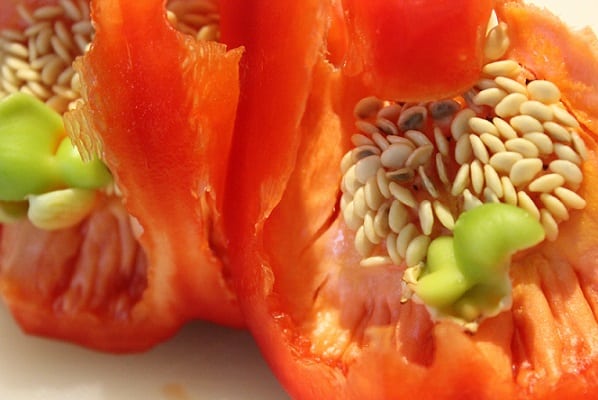
3. Bell Peppers
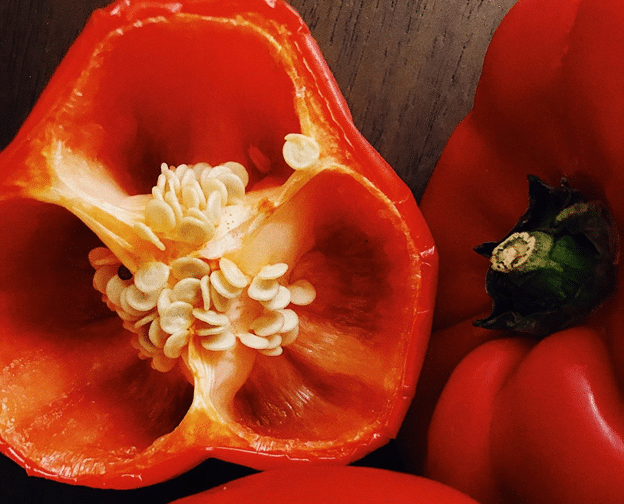
Cut the pepper open and brush off the seeds in the central stem. Then place them on a plate and leave them to dry. That’s it!
4. Pumpkins and Squashes
Once they’re completely ripe, cut them open and scoop out the seeds. Ensure that you remove all the membrane and stringy stuff that may be clinging to them. Rinse them under running water before placing them on a plate to dry.
5. Beans and Peas
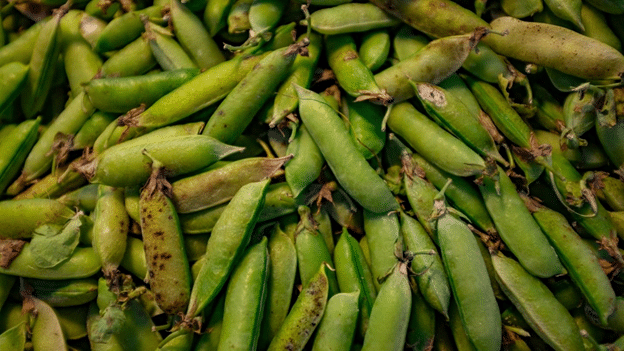
Once the pods are dry and crackly, remove them from the vines. Proceed to separate the seeds from the pods, place them in a loosely woven basket, and leave them to air-dry for about six weeks. Ensure that you stir them at least once a day to prevent moisture from building up.
Saving Seeds Is Easy-Peasy
Saving organic vegetable seeds from your favorite plants is a lot easier than you think. Simply follow the directions detailed in this seed saving guide, and you’ll be able to store your seeds for years on end.
All in all, the secret to seed saving lies in making sure that you pick them from the healthiest plants at the right time and dry them properly to ensure that they remain viable. Easy-peasy!
For more tips on growing your own organic vegetables in your outdoor or indoor garden, sign up for our newsletter today. We might award you with a free pair of gardening gloves while you’re at it!